


How to Knead the Perfect Dough for Rotis/Parathas
When I was a kid, I was great friends with our cook’s daughter, Salma, who was much older than me but so sweet, friendly and was always happy to indulge me. It’s not easy to deal with little kids, and to have them on your back all the time can get physically and mentally exhausting. But she always had a smile on her face and played with me and talked to me and showed me how to do all kinds of things in the kitchen and around the house.
I loved it when she or her mother kneaded dough. Of course, in Pakistan, a wide paraat is used for this purpose- a round, wide tray with an edge that’s about 3 inches high. So perfect for this. I used to love watching them do it,sitting on a stool with the paraat in front on the floor. It seemed like a lot of fun! I also asked my mother if I could do it a few times. And although it’s really fun to watch, it takes quite some stamina, especially if you’re 7. But once I started, I made sure to knead it to my mother’s liking (no easy task).
Now, I can’t say that I love kneading the dough, (ha ha). I find it so strange how things change so completely when you grow up. Kneading? Fun? I don’t know what I was thinking! But at that time I couldn’t imagine not enjoying it! When my 3 year old pulls up a chair next to me in the kitchen to watch me cook, it takes me back to when I used to do exactly that when my mother was cooking. I may not be that little girl anymore, but I remember exactly what it felt like. I know she feels the same because she will leave her books, toys, doodles and television to come and stand next to me and I simply love it! I have her take a whiff of all the spices that I’m using, (she only likes cinnamon), name the ingredients, stir the food and outline the steps. We like to start our training early here at Zabiha Bites!
So, to make some warm, comforting memories in the kitchen, here is my recipe for aata, or basic roti/paratha/poori dough.
Because you have to put some force into it, I like to put the bowl in the sink, otherwise it’s a very awkward angle on the kitchen counter.
Dough for rotis/parathas/pooris
Ingredients:
- 2 rounded cups whole wheat flour (aata) (My favorite is Whole Wheat Sujata Aata)
- 1 tsp salt
- Around 1¼ cups water
- 1 tbsp oil (Optional for rotis/parathas but I always add it for pooris)
Method:
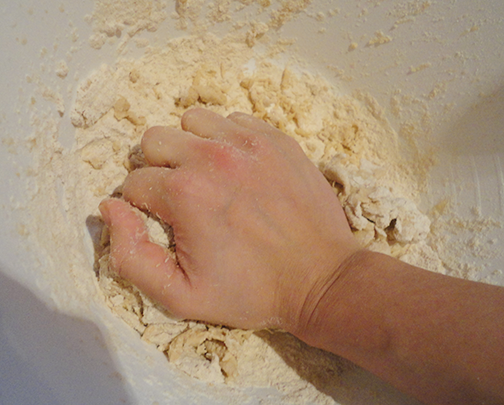
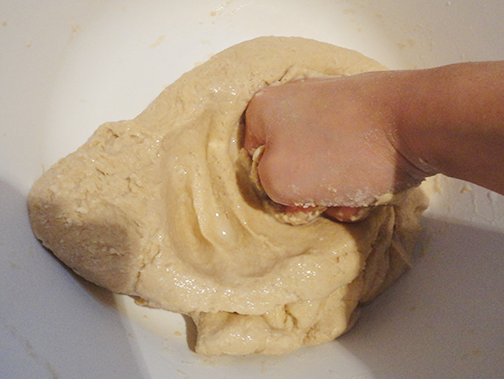
Mix the flour and salt in a wide mixing bowl. Add the water, a little bit at a time and start kneading. You can knead in 2 ways and I use both. Make a fist with your hand and press the dough down with your knuckles. I’m using one hand, but you can use both if you’re not holding a camera in the other one :), and if your bowl is big enough.

You can also grab the dough, press it down and turn it over.
Keep adding the water and keep kneading. I would strongly advise taking the time to do this and not throwing all the water in at once. This step can make all the difference. Slow and steady.
Take your time to keep kneading and adding the water until all the dough comes together. This should take about 1 cup of water.

Now, I wet my knuckles and take a little water with my fingers and add it to the dough. This lets me control the water added to it and keeps it to a minimum. The dough should not stick from this point on. Too much water will make the dough sticky and impossible to knead. You will have to add more flour, and then there’s a chance that you will get lost in the ‘a little more flour, a little more water’ vicious circle.
Knead it all out,
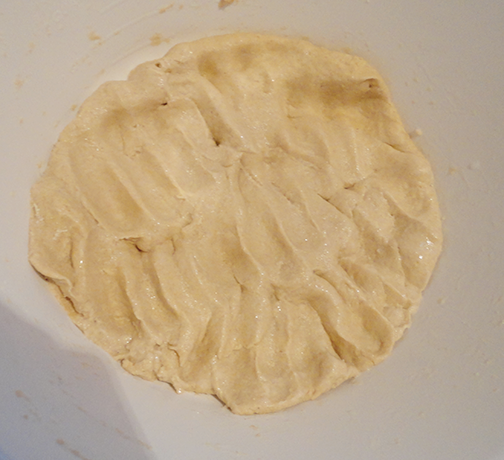
and roll it back.

Now wet your hand and knead it out again. Sometimes I turn the folded dough and then knead it.

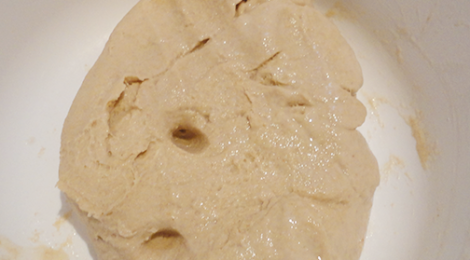
The dough should not be sticky. Repeat these steps until the dough becomes soft and smooth, and bounces back when you poke a finger into it.* Do not let the dough get sticky. Just when it starts to stick even the slightest bit, that means that it has absorbed all the water that it can. No more needs to be added.
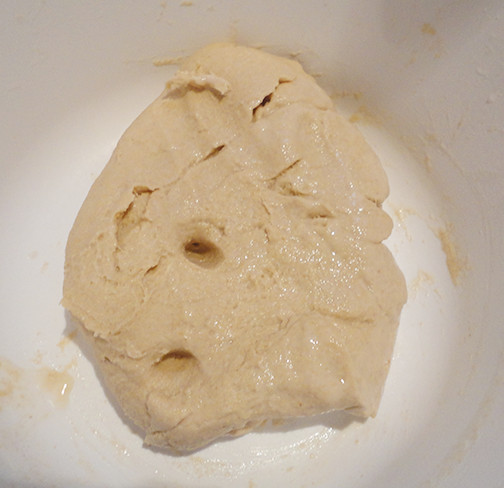
You can see that it has just started to get sticky here. You can stop a tad earlier than this stage.
*What exactly does it mean for the dough to bounce back, anyway? If I was kneading dough for the first time, I don’t think I would understand what ‘bounce back’ meant. Here’s an explanation:
So, during the initial stage of kneading, if you poke your finger into the dough, the dough will resist, and feel hard. As you continue kneading and adding water, the dough will become softer, and when it’s done, your finger will easily go in and come out. If you add too much water, the dough will become sticky, and your finger will go in with a big ‘squelch‘ and get sticky dough all over it and not slide out as easily.
I knead my dough for a good 10-12 minutes in all. Remember, a well kneaded dough is key to making good rotis/parathas. Cutting corners here is not recommended!
Transfer to an air tight container and store in the refrigerator.
*Dough is best when used after refrigerating for a few hours. Even refrigerating for half an hour can make a difference. If you don’t have time to refrigerate the dough and need to use it straight away, then don’t make the dough too soft. This will make it easier to handle for immediate use, for rotis/parathas only. For pooris, refrigerating for 6 hours or overnight is a must. Otherwise the pooris will come out hard. You have been warned.
Dough using a Stand Mixer (Courtesy Raabia Khan Mohammad)
My cousin skips the manual labor and employs her beautiful Kitchenaid Stand Mixer (click to buy) to do the dirty work. So for all those who have one, cut straight to this recipe. It will make your life a whole lot easier (as stand mixers tend to do).
Ingredients:
3 cups flour
1 tbsp olive oil
1 tsp salt (optional)
1 cup warm water
Method:
Put the flour, salt and olive oil in the mixer.
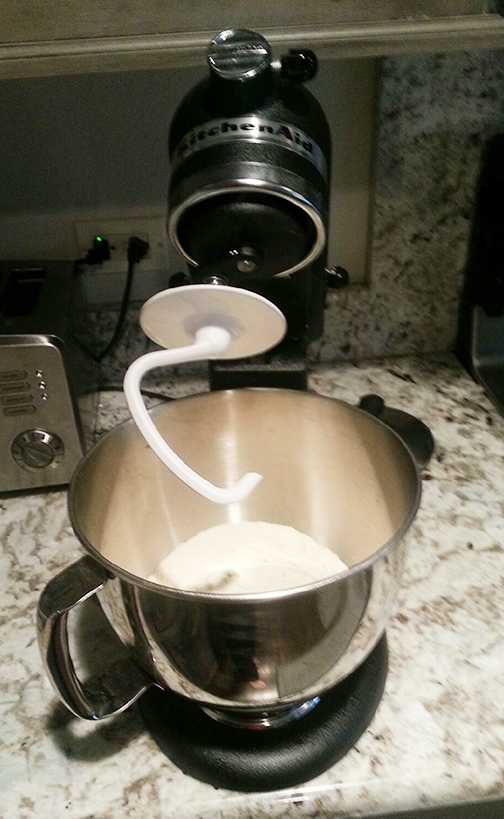
- Kneading Dough using a Stand Mixer
Start the mixer on a slow speed (using the dough hook attachment) and slowly begin adding the water. Raise the speed of the mixer. Continue adding the water until you get the right soft, smooth consistency.
After the dough is all mixed leave it in the mixer for about 15 min. Then mix it again for one minute. Put it in the refrigerator. You need at least 6 hours of refrigeration before you should use it.
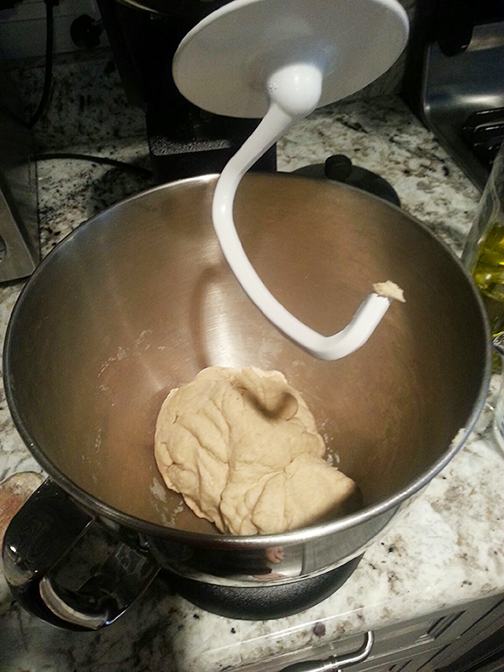
- Kneading Dough using a Stand Mixer
- *My experience has been that a stand mixer uses less water to bring the dough together compared to kneading by hand. This means that the dough is not as soft either. I usually start off in the mixer, but then finish it off by hand, wetting my knuckles and kneading until it reaches the soft consistency that I like (described above).
Please ‘like’ Zabiha Bites on Facebook.
Related Posts:
Hi, thank you sooooo much for this, it really helped!
Oh Allah if only I am able to make the roti. I have literally given up on making them. My husband is a big chawal ( rice) fan and he doesn’t like roti/paratha. I make bread but the Pakistani roti and paratha have become extinct in my household! I have tried previously but it turns out to be huge failure- it is either too stiff or takes the shape of some country like Australia or even Long Island!
I really shouldn’t have taken for granted all those days when my mother dearest made them for us almost every single day of our lives when we were young.